The Complete Guide to Stainless Steel Transition Strips
The sleek gleam of stainless steel has always caught my eye in architectural applications, but it wasn’t until I faced a particularly challenging flooring transition in a waterfront property that I truly appreciated the value of quality stainless steel transition strips. That project—with its combination of hardwood, tile, and exposure to salt air—taught me more about transition solutions than any product brochure could.
Transition strips might seem like minor details in the grand scheme of construction or renovation, but they often become the unsung heroes of durability, safety, and design cohesion. These modest components create seamless connections between different flooring materials, accommodate slight height variations, and provide critical protection at material junctions. And when crafted from stainless steel, they bring exceptional durability and aesthetic appeal to these functions.
Understanding Stainless Steel Transition Strips
Stainless steel transition strips serve as the bridge between different flooring materials, creating smooth transitions that protect edges while enhancing safety and visual appeal. Unlike their aluminum or vinyl counterparts, stainless steel versions offer superior durability, corrosion resistance, and a distinctive premium appearance that complements modern architectural styles.
What makes these components particularly valuable is their combination of functional performance with design versatility. The inherent properties of stainless steel—its strength, resistance to moisture and temperature fluctuations, and dimensional stability—make it ideal for transitions in both residential and commercial settings. During a recent kitchen renovation project, I was struck by how the right stainless transition completely transformed the junction between hardwood flooring and ceramic tile, creating a seamless flow that elevated the entire space.
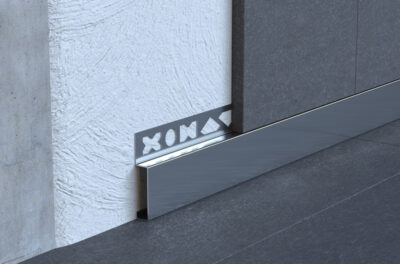
Stainless steel transition strips typically consist of a profile (the visible part) and sometimes an anchoring system. The profile might be T-shaped, sloped, flat, or custom-designed to address specific height differences or application requirements. The anchoring system, when present, secures the strip to the subfloor and ensures stability under foot traffic.
The history of transition strips reflects broader trends in building materials and design. While traditional wood thresholds dominated for centuries, metal transitions gained popularity with the rise of modernism in the mid-20th century. Stainless steel options emerged as premium alternatives, offering improved performance over other metals, particularly in moisture-prone areas. As E-Sang and other manufacturers have refined their production techniques, these components have evolved from purely functional elements to design features in their own right.
Types and Varieties of Stainless Steel Transition Strips
The world of stainless steel transition strips is surprisingly diverse, with numerous profiles designed for specific applications. During my consultation with an architectural hardware specialist last month, I discovered several categories I hadn’t previously considered.
Common Profiles
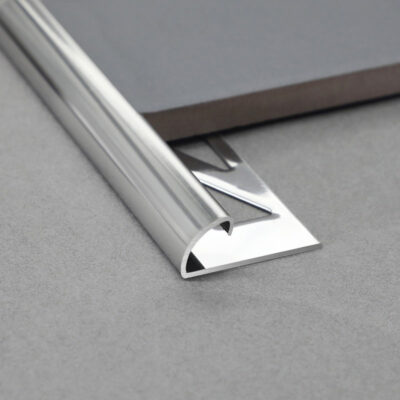
T-shaped transitions remain among the most versatile, creating a smooth junction between flooring materials of equal height. Their horizontal flanges rest on both surfaces while the vertical web fills the gap. Reducer strips, alternatively, manage transitions between floors of different heights, with a gentle slope that eliminates tripping hazards. For tile-to-carpet or similar transitions, Z-bar profiles provide an elegant solution by accommodating the height difference while securing the edge of the more flexible material.
Some manufacturers offer specialized profiles for unique situations. Expansion joints incorporate flexible components to accommodate building movement, while water barriers include design elements to prevent moisture migration between spaces. Having installed various profiles across different projects, I’ve found that selecting the right one requires considering not just the height difference but also the materials being joined and the environmental conditions.
Material Variations
Not all stainless steel is created equal, a fact that became strikingly clear during a beachfront installation I supervised last year. The property owner had previously used 304-grade stainless transitions that showed corrosion after just two seasons of salt air exposure.
The most common grades include:
| Stainless Steel Grade | Corrosion Resistance | Typical Applications | Relative Cost |
|---|---|---|---|
| 304 (18/8) | Good resistance to most environments | Standard indoor applications, most residential uses | $$ |
| 316 (Marine Grade) | Superior resistance, especially to chlorides | Coastal areas, pools, spas, commercial kitchens | $$$$ |
| 430 | Moderate resistance | Decorative applications in dry areas | $ |
| 201 | Lower resistance than 304 | Budget options for less demanding environments | $ |
Marine-grade 316 stainless contains molybdenum, which significantly enhances resistance to chloride environments like salt air or pool chemicals. For that beachfront project, we ultimately selected 316-grade transitions, which have shown no signs of deterioration even three years later.
Finish Options
The aesthetic appeal of stainless transitions largely depends on their finish. Brushed (or satin) finishes show fewer fingerprints and minor scratches, making them practical for high-traffic areas. Polished finishes create a mirror-like appearance that can dramatically enhance modern spaces but require more maintenance. For a boutique hotel renovation I consulted on, we selected polished transitions for the lobby but brushed finishes for the corridors and guest rooms—balancing visual impact with practical considerations.
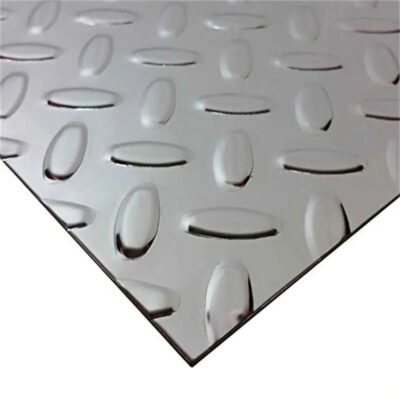
Some manufacturers offer specialty finishes like engine-turned patterns or colored PVD coatings that add unique visual elements. These can create striking contrasts or harmonize with specific design schemes, though they typically command premium prices.
Size and Thickness Considerations
Stainless transition strips come in various widths and thicknesses, each suited to particular applications. Residential settings typically use narrower profiles (1-2 inches wide), while commercial applications often require wider transitions (2-4 inches or more) to accommodate greater wear and potentially larger gaps between materials.
The thickness of the stainless steel significantly affects durability. I’ve found that transitions less than 1mm thick may develop dents or bends under heavy use, while those 1.5mm and above maintain their shape even in commercial settings. The project requirements, anticipated traffic, and budget considerations should guide these specifications.
Benefits and Applications of Stainless Steel Transition Strips
The advantages of stainless steel transition strips extend well beyond their basic function of connecting different flooring surfaces. During a recent hospitality design conference, a materials scientist presented compelling data on their long-term performance that reinforced what I’ve observed across various projects.
Durability Advantages
Stainless steel’s inherent properties make it extraordinarily resilient in transitional applications. Its hardness (5.5-6.5 on the Mohs scale) provides excellent resistance to denting, scratching, and abrasion—significantly outperforming aluminum (2.5-3) and most polymers. This becomes particularly important at material junctions where mechanical stresses concentrate.
The corrosion resistance of stainless steel represents perhaps its most significant advantage. Unlike other metals that oxidize and deteriorate, properly specified stainless maintains its integrity even in challenging environments. A property manager I interviewed noted that their facility had replaced aluminum transitions three times over 15 years in their entryways, while the stainless transitions in the same building remained intact and functional.
Heat and cold resistance also distinguish stainless transitions. They maintain dimensional stability across temperature ranges that would cause expansion issues with vinyl or aluminum alternatives. This makes them ideal for transitions near exterior doors, fireplaces, or radiant floor heating systems.
Aesthetic Appeal
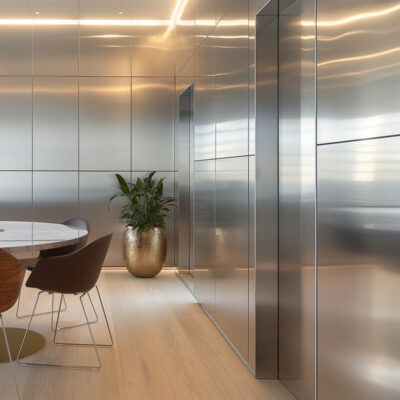
The visual characteristics of stainless steel transitions contribute significantly to their popularity. Their clean, sophisticated appearance complements contemporary design while also working well in transitional styles. The reflective quality adds subtle highlights that can enhance spatial perception.
An interior designer at the conference shared her perspective: “Stainless transitions have this remarkable ability to simultaneously blend and accentuate. They don’t compete with the flooring materials, but they provide just enough definition to emphasize intentional material changes.”
I’ve found this particularly true in open-concept spaces where flooring transitions help define functional areas without requiring walls. The subtle line of a stainless transition can delineate the kitchen from the dining area or the entry from the living space in a visually elegant way.
Versatility Across Settings
The adaptability of stainless steel transition strips makes them suitable for an impressive range of environments:
| Setting | Benefits of Stainless Transitions | Recommended Applications |
|---|---|---|
| Residential | Durability, clean appearance, ease of cleaning | Kitchens, bathrooms, entries, material transitions in open-concept layouts |
| Commercial | High traffic resistance, longevity, professional appearance | Retail floors, office buildings, restaurants, hotels |
| Healthcare | Sanitation, chemical resistance, smooth transitions for medical equipment | Hospitals, clinics, laboratories, elder care facilities |
| Hospitality | Luxurious appearance, durability, moisture resistance | Hotel bathrooms, spa facilities, restaurant entries |
| Industrial | Chemical resistance, load-bearing capacity, safety compliance | Manufacturing facilities, warehouses, commercial kitchens |
In healthcare environments, the non-porous nature of stainless steel prevents bacterial harborage, while its resistance to cleaning chemicals maintains appearance over time. A hospital facilities manager explained that their stainless transitions have withstood more than a decade of daily disinfectant cleaning without degradation.
Industrial applications benefit from stainless steel’s load-bearing capacity and resistance to chemicals. During a warehouse renovation I consulted on, the client specifically requested stainless transitions capable of withstanding forklift traffic between different flooring zones—a requirement that few other materials could meet.
Installation Best Practices for Stainless Steel Transition Strips
The performance of even the highest-quality stainless transition strip ultimately depends on proper installation. Having overseen dozens of installations, I’ve identified critical factors that determine long-term success.
Preparation Requirements
Proper preparation creates the foundation for a successful transition strip installation. The substrate must be clean, dry, and structurally sound. Any damage to the subfloor should be repaired, and existing floor coverings must be securely fastened with no loose edges.
Height assessment is crucial and sometimes overlooked. Precise measurement of the difference between flooring surfaces determines the appropriate profile. I recommend using a digital level for these measurements, as even small discrepancies can result in an improper fit.
Gap preparation depends on the installation method. For mechanical fastening, pre-drilling may be necessary. For adhesive installations, the surface must be completely free of dust, oils, and residues that might compromise bonding. I learned this lesson the hard way during an early project when inadequate surface preparation led to adhesive failure within weeks.
Tools and Materials
The specific requirements vary by installation method and strip profile, but typically include:
- Measuring tools: Tape measure, digital level, straight edge
- Cutting tools: Metal-cutting saw with appropriate blade, metal file for smoothing cut edges
- Fastening tools: Drill with metal bits (for mechanical installation), notched trowel (for adhesive)
- Safety equipment: Gloves, eye protection, ear protection
- Materials: Appropriate fasteners or adhesive, shims if needed
When cutting stainless steel transitions, the right blade makes all the difference. A fine-tooth blade designed for metal prevents burring and discoloration from heat. During a complex installation with numerous cuts, I switched from a standard blade to one specifically designed for stainless steel, which dramatically improved both the efficiency and quality of cuts.
Installation Methods
Stainless steel transition strips can be installed using several methods, each with specific applications:
Mechanical Fastening
This traditional method uses screws to secure the transition strip directly to the subfloor. Pre-drilling is essential to prevent splitting or warping. The screw heads should be countersunk and, for exposed installations, covered with matching caps or plugs.
Mechanical fastening provides the strongest hold and allows for later removal if needed. However, it creates penetrations in the floor that might be problematic in moisture-prone areas. During a bathroom renovation, we opted against this method to maintain waterproof integrity.
Adhesive Installation
Modern construction adhesives designed for metal-to-substrate bonding can provide excellent results without penetrating the floor. The adhesive should be applied according to the manufacturer’s specifications, typically in a continuous bead or with a notched trowel.
This method works best when:
- The transition will not bear extraordinary weight
- The substrate is completely stable
- Waterproofing considerations prevent mechanical fastening
- The visual appearance must remain uninterrupted by fasteners
Mortaring for Tile Applications
For transitions alongside ceramic or stone tile, the strip can sometimes be set in the same mortar bed as the tile. This creates an exceptionally strong bond and perfect height alignment. I’ve used this method successfully in several shower transitions, where the stainless strip provides both a clean finish and additional waterproofing.
Track Systems
Some stainless transitions utilize a two-part system with a base track that’s installed first, and a visible cap that snaps or slides into place afterward. This approach allows the structural attachment to be completed before final flooring installation, with the finished piece added last to prevent damage.
I’ve found track systems particularly valuable for complex renovations where various trades must coordinate their work. The base can be installed early in the process, with the visible portion protected until the very end of construction.
Common Installation Challenges
Even experienced installers encounter difficulties with stainless transitions. Anticipating these challenges can prevent costly mistakes.
Height Discrepancies
When flooring materials differ significantly in thickness, standard transitions may not accommodate the variance. Solutions include:
- Custom profiles designed for specific height differences
- Building up the lower surface with appropriate underlayment
- Creating a graduated transition using multiple pieces
In a historical renovation project, we faced a 3/4″ difference between original hardwood and new tile. Rather than using a single steep transition, we created a more gradual change using two stainless pieces with a small plateau between them, which proved both more visually appealing and safer for foot traffic.
Curved Applications
Most transition strips come in straight lengths that don’t easily conform to curves. For curved transitions, options include:
- Heat bending (for less severe curves)
- Factory custom bending (for predictable curves)
- Creating faceted approximations using multiple short straight pieces
The last approach proved effective in a circular foyer design where we used twelve short segments to create the appearance of a curved transition between wood and marble.
Subfloor Irregularities
Uneven subfloors can prevent proper contact between the transition strip and the substrate. Thorough assessment and correction of the substrate should precede installation. Depending on the situation, this might involve:
- Using a self-leveling compound to create a flat surface
- Shimming the transition strip where necessary
- Grinding down high spots in concrete subfloors
Maintenance and Longevity of Stainless Steel Transitions
The exceptional lifespan of stainless steel transitions depends not only on quality selection and installation but also on proper maintenance. A facilities manager I consulted with maintains that their 15-year-old stainless transitions “still look nearly new” thanks to consistent care.
Cleaning and Care
Routine maintenance of stainless steel transitions requires minimal effort but consistent attention. For day-to-day cleaning, warm water with a mild detergent is typically sufficient. A soft cloth should be used to avoid scratching the surface, particularly on polished finishes.
For more stubborn substances, specific approaches are recommended:
| Contaminant | Cleaning Approach | Notes |
|---|---|---|
| Fingerprints | Microfiber cloth with glass cleaner | Works well on both brushed and polished finishes |
| Food residue | Warm water with mild detergent | Avoid prolonged contact with acidic foods |
| Adhesive residue | Citrus-based cleaner | Test in inconspicuous area first |
| Mineral deposits | White vinegar solution (1:1 with water) | Especially useful in hard water areas |
| Light scratches (polished finish) | Stainless steel polishing compound | Follow with thorough cleaning |
The direction of cleaning is important for brushed finishes—always wipe in the direction of the grain to maintain appearance. Circular motions can create visible swirls that alter the intended aesthetic.
What should be avoided is equally important. I’ve witnessed the consequences of using inappropriate cleaning methods, including:
- Abrasive cleaners or pads, which create scratches
- Chloride-containing products, which can cause corrosion even on stainless steel
- Steel wool or metal brushes, which can embed carbon steel particles that later rust
Environmental Factors Affecting Lifespan
While stainless steel offers exceptional durability, certain environmental conditions can affect its performance and appearance over time.
Exposure to Chlorides
Salt (sodium chloride) and other chloride compounds represent the most significant threat to stainless steel’s integrity. In coastal locations or areas where road salt is used extensively, even 304-grade stainless can show corrosion over time. In these environments, 316-grade should be considered essential.
I observed this firsthand at a beachfront property where the original 304 stainless transitions showed pitting corrosion after just two years, while the replacement 316 transitions have remained pristine for over five years.
Chemical Exposure
Industrial environments or areas with specific chemical exposures require careful consideration. While stainless steel resists many chemicals, concentrated acids, bleach solutions, and some industrial compounds can potentially damage even high-quality stainless steel. In a laboratory renovation, we selected specialized transitions with enhanced chemical resistance specifically designed for that environment.
Galvanic Corrosion
When stainless steel contacts dissimilar metals in the presence of an electrolyte (even moisture in the air), galvanic corrosion can occur. This risk is particularly relevant when stainless transitions are used with aluminum tracks or certain fasteners. Proper isolation through coatings or separators can prevent this issue.
Addressing Common Issues
Even well-maintained stainless transitions may develop issues over time. Addressing these promptly helps maintain both function and appearance.
Surface Scratches
Light scratching is inevitable in high-traffic areas. On brushed finishes, fine scratches parallel to the grain are often barely noticeable. For more significant scratches, stainless steel restoration kits can help blend the damage. These typically include progressively finer abrasives and polishing compounds.
During a restaurant renovation, we successfully restored rather than replaced the existing stainless transitions, using specialized polishing techniques that saved the client considerable expense while achieving nearly new appearance.
Discoloration
Heat tint (rainbow discoloration) sometimes appears near heat sources or from improper cutting during installation. This surface oxidation doesn’t compromise structural integrity but affects appearance. It can often be removed with specialized stainless steel cleaners containing mild acids formulated specifically for this purpose.
Loose Fasteners
Mechanical vibration or settling can occasionally loosen fasteners in mechanically-attached transitions. Periodic inspection and tightening prevent more significant issues. In commercial applications with heavy traffic, I recommend quarterly inspections of fasteners as part of regular maintenance.
Selection Criteria for Your Project
Choosing the right stainless steel transition strips involves balancing numerous factors beyond simple appearance. The following framework, developed through years of specifying these components across diverse projects, helps ensure appropriate selection.
Environment Assessment
The installation environment should be your primary consideration, as it determines the appropriate grade of stainless steel and potential need for specialty finishes or protective measures.
Moisture Exposure: Areas with frequent or constant moisture require 316-grade stainless at minimum. This includes:
- Bathrooms, especially shower thresholds
- Pool surroundings
- Outdoor transitions
- Commercial kitchens
Chemical Exposure: Consider any cleaning regimens or environmental chemicals that might contact the transition. In healthcare environments, for instance, the frequent use of powerful disinfectants might necessitate higher-grade stainless steel or protective treatments.
Temperature Fluctuations: Transitions near exterior doors in extreme climates experience significant temperature swings. While stainless steel handles these well, the differential expansion of adjacent materials may require specific profiles with expansion allowances.
Traffic Considerations
The volume and type of traffic significantly impact profile selection and thickness requirements.
Foot Traffic Volume: High-traffic commercial applications require thicker stainless (typically 2mm minimum) and profiles designed to withstand constant use. Residential applications can often use thinner material (1-1.5mm) successfully.
Wheeled Traffic: If the transition will experience wheeled traffic—from office chairs to gurneys to industrial equipment—this must be accounted for in both profile selection and installation method. Sloped transitions generally perform better than abrupt T-profiles for wheeled traffic.
ADA Compliance: In commercial and public settings, transitions must comply with accessibility requirements, generally limited to 1/4″ (6.35mm) vertical change maximum. Beveled transitions can accommodate slightly greater height differences while maintaining compliance.
Aesthetic Integration
Stainless steel transitions should complement rather than distract from the overall design scheme.
Finish Coordination: Consider existing stainless elements (appliances, fixtures, hardware) and select a matching finish for visual consistency. In a recent high-end residential project, we carefully matched the brushed finish of the kitchen appliances in the adjacent flooring transitions for a cohesive appearance.
Profile Visibility: Determine whether the transition should be a visible design element or blend inconspicuously. Some designs call for transitions that create deliberate visual lines, while others benefit from minimal profiles that disappear visually.
Width Proportions: The transition width should be proportional to the space. Large, open areas can accommodate wider transitions that might look overwhelming in smaller spaces.
Decision Matrix
For complex projects, I often create a simple decision matrix to weigh various factors:
| Factor | Weight | Option A Score | Option B Score | Option C Score |
|---|---|---|---|---|
| Durability/Suitable Grade | 30% | 8 (2.4) | 9 (2.7) | 10 (3.0) |
| Aesthetic Compatibility | 25% | 9 (2.25) | 8 (2.0) | 7 (1.75) |
| Cost Effectiveness | 20% | 9 (1.8) | 7 (1.4) | 5 (1.0) |
| Ease of Installation | 15% | 8 (1.2) | 7 (1.05) | 6 (0.9) |
| Maintenance Requirements | 10% | 8 (0.8) | 9 (0.9) | 9 (0.9) |
| Total Score | 100% | 8.45 | 8.05 | 7.55 |
This approach forces objective consideration of all relevant factors and often reveals that the optimal choice isn’t necessarily the most expensive or visually striking option.
Budget Considerations
Stainless steel transitions typically represent a premium choice compared to aluminum or vinyl alternatives, but their value proposition often justifies the investment.
In my experience, the cost breakdown typically looks like this:
- Material grade (304 vs. 316): 15-25% price differential
- Thickness: Each 0.5mm increase typically adds 10-15% to material cost
- Finish: Polished finishes generally command a 15-20% premium over brushed
- Profile complexity: Custom or complex profiles can cost 30-100% more than standard options
When advising clients with budget constraints, I focus on where compromises are least likely to affect performance. For instance, in a dry indoor residential application, 304-grade stainless with standard thickness often provides all the necessary performance at a lower price point than 316-grade with extra thickness.
Innovations and Trends in Transition Strip Technology
The world of stainless steel transition strips continues to evolve, with manufacturers developing new solutions to address emerging needs and design preferences. During a recent trade show, I had the opportunity to explore several innovations that signal where this category is heading.
Integrated Lighting Solutions
One of the most striking developments combines stainless transitions with LED lighting systems. These serve both functional and aesthetic purposes:
- Improving safety by highlighting level changes in dimly lit areas
- Creating dramatic effects in hospitality and retail environments
- Providing subtle nighttime wayfinding in residential settings
A hospitality designer I spoke with has incorporated these illuminated transitions in several boutique hotel projects, noting that “they transform a basic safety element into a memorable design feature.” The integration of low-voltage wiring requires additional installation considerations but creates effects impossible to achieve with standard transitions.
Sustainable Manufacturing Approaches
Sustainability has become a significant factor in architectural materials, and stainless steel transition manufacturers are responding with several approaches:
- Higher recycled content (many now offering 75%+ recycled stainless steel)
- Reduced-energy manufacturing processes
- Water recovery systems in production facilities
- Cradle-to-cradle certification for complete products
The inherent recyclability of stainless steel already provides environmental advantages, but these additional measures further reduce the ecological footprint. A materials specialist at the trade show explained that “the production energy investments are offset by the exceptional lifespan of the product” when compared with alternatives requiring more frequent replacement.
Custom Design Services
Beyond standard profiles, manufacturers increasingly offer custom design capabilities to address unique architectural requirements. These services range from simple modifications of existing profiles to completely bespoke solutions for specific projects.
I recently collaborated with a manufacturer on a custom transition for a curved glass wall installation. The resulting piece featured a variable-width design that accommodated the geometric complexities of the space while maintaining the clean aesthetic the architect envisioned. While custom solutions command premium pricing, they often prove more cost-effective than field-fabricated alternatives.
Future Directions
Several emerging technologies may shape the next generation of stainless transitions:
Advanced Surface Treatments: Nano-scale treatments that enhance resistance to fingerprints, scratches, and bacterial growth without altering appearance.
Smart Integration: Embedding sensors in commercial transitions to monitor foot traffic patterns or identify maintenance needs.
Enhanced Accessibility: Developing transitions with tactile indicators to improve navigation for visually impaired individuals.
Material Hybridization: Combining stainless steel with other materials (carbon fiber, ceramics) to create transitions with specialized performance characteristics.
Conclusion: Making the Right Choice for Your Project
Selecting the appropriate stainless steel transition strip ultimately requires balancing technical requirements, aesthetic considerations, and budget constraints. Through dozens of projects ranging from residential renovations to commercial installations, I’ve observed that the most successful selections prioritize long-term performance while harmonizing with the overall design vision.
The superior durability of stainless steel transitions makes them particularly well-suited to high-value installations where longevity matters. Though the initial investment exceeds that of alternatives, the extended service life and reduced maintenance requirements typically yield lower lifetime costs. A commercial property manager I consulted with calculated that their stainless transitions had saved approximately 40% over a 12-year period when accounting for replacement costs of less durable materials.
When selecting transitions for your own project, remember to:
- Thoroughly assess the environmental conditions the transition will face
- Consider traffic patterns and potential mechanical stresses
- Evaluate the aesthetic relationship to other design elements
- Calculate long-term value rather than focusing exclusively on initial cost
- Ensure proper installation techniques are followed
The modest strip bridging different flooring materials may seem insignificant in the grand scope of a construction or renovation project. Yet this small detail often has disproportionate impact on both functional performance and visual refinement. Investing appropriate consideration in selecting quality stainless steel transitions pays dividends in both the immediate appearance and long-term satisfaction with the completed space.
Frequently Asked Questions about Stainless Steel Transition Strips
Q: What are Stainless Steel Transition Strips and How Do They Function?
A: Stainless steel transition strips are specially designed to provide a sleek and durable way to transition between different flooring types or levels. They serve as a bridge, ensuring a smooth and safe transition from one floor material to another, such as from tile to wood or carpet. These strips are made from stainless steel, renowned for its corrosion resistance and aesthetic appeal. They are available in various styles and installation methods, offering flexibility for different flooring scenarios.
Q: What are the Benefits of Using Stainless Steel Transition Strips?
A: The benefits of stainless steel transition strips include their durability, ease of maintenance, and high aesthetic value. They offer a modern look that complements both classic and contemporary designs. Additionally, they are resistant to rust and corrosion, making them suitable for use in environments with varying humidity levels. These strips also help prevent tripping hazards by smoothing out transitions between floors of different heights or textures.
Q: How Do I Choose the Right Type of Stainless Steel Transition Strip?
A: When choosing the right stainless steel transition strip, consider the type of flooring involved, the height difference between them, and the style you prefer. For instance:
- T-Bar Strips are ideal for same-height transitions, ensuring smooth movement.
- Reducer Strips are used when there is a height difference between flooring types.
- Consider the grade of stainless steel, with options like 304 for indoor use and 316 for more corrosive environments.
Q: Can I Install Stainless Steel Transition Strips Myself?
A: Yes, you can install stainless steel transition strips yourself with basic DIY skills. The process typically involves measuring the area, cutting the strip to size using a metal saw, and securing it with either adhesive or screws. Ensure the surface is clean and dry before installation and follow the manufacturer’s instructions for specific products. Protect yourself with gloves and safety glasses when handling stainless steel.
Q: How Do I Maintain Stainless Steel Transition Strips to Keep Them Looking New?
A: Maintaining stainless steel transition strips involves regular cleaning with a mild detergent and water to remove dirt and grime. Avoid using abrasive cleaners or scrubbers to prevent scratches. Regularly inspect the adhesive or screws to ensure the strip remains securely in place. This care will keep the strips looking new and extend their lifespan.
Q: Are Stainless Steel Transition Strips Suitable for Different Flooring Materials?
A: Yes, stainless steel transition strips are versatile and suitable for various flooring materials, including tile, wood, carpet, and laminate. They can be used in both residential and commercial settings due to their durability and adaptability. The choice of strip depends on the specific flooring combination and the desired aesthetic effect.